Showing posts with label Latex. Show all posts

Wednesday, February 27, 2019

JSAC Submission Error: "Upload failed: One or more fonts are not embedded."

This is a very common problem that JSAC needs to fix.
Understanding the problem: 
Lets say we generate the PDF by using some Latex editor such as TeXstudio. 
By default the all the font are not embedded to the PDF itself. This is to keep the PDF size small. Embedding all fonts is not necessary because some fonts are common to all modern OS. So it does not make sense to embed all the fonts in the PDF itself.

You can check the list of fonts embedded by following steps:
1. Open the PDF
2. Right click on any place
3. Click on "document properties."
4. Click on "Font" tab.

 
But, the EDAS system, through which we usually submit the manuscript, expect all the fonts to be embedded into the PDF.

How to solve (Windows OS)?
    1> After generating the PDF using any Latex Editor, find the corresponding .ps file, probably in the same directory
    2> Open the Windows command prompt 
    change the current directory to the directory of PS file. 
Now enter following command 


    ps2pdf -dPDFSETTINGS#/prepress -dEmbedAllFonts#true -dMaxSubsetPct#100 -dCompatibilityLevel#1.3 file_name.ps file_name.pdf

  3> Give the ps file name and the output pdf file name. 
Now in the new pdf file, you can see the embedded fonts.


EDIT (23 Jan 2020):
How to Solve (Mac OS)?
- Open the PDF with Preview app (I am using MacOS Catalina)
- Under "File" menu select "Export as PDF..."
- Give different filename and click on "Save" button.
Be default this should embed all the fonts.


Thursday, March 29, 2018

Adding biography section into elsevier latex article


Mostly in research community Latex is used to write the articles that are published in different journals. Biography section is the last section in all articles. IEEEtran and elsarticle are the most widely used latex template which offer multiple commands to represent the research content/data in different manner. For example, IEEEbiography command is used to write the biography section in IEEEtran template. But no such similar command is available if you write the article using elsarticle template.

In reality, you don’t need any special command to write author’s biography if you are using elsarticle template. You can compare both the papers. The first paper is published in IEEE and the second is published in Elsevier.
IEEE paper: http://ieeexplore.ieee.org/document/8169111/?anchor=authors
Elsevier paper: https://www.sciencedirect.com/science/article/pii/S0164121216300887#b1

In elsarticle template, you can use following simple code to add biography section.


Code:

1
2
3
4
5
6
\pagebreak
% Biography Section
%\section*{ }
\noindent \textbf{Author1 name} author description goes here.
\subsection*{  } % This subsection (with no heading) is added to give more space between two biographies
\noindent \textbf{Author2 name}  author description goes here. 

Output:

I have observed that, most of the Elsevier journals add the biography section in new page. For this purpose \pagebreak command should be added

Usually in the biography section contains no title is given. For which either you can complete ignore use of \section command or you can use \section command with no title.

The entire content (From Line 1 to Line 6) should be at the end of the document but must be before \end{document} command.


-Thats all

Friday, May 12, 2017

Fixing WinEdit MDI event handler macros error.

Environment
     OS: Windows 7 32bit
     WinEdit v5.4 (build: 20050201)

Error :


Possible Reason: 
     Either the path mentioned is wrong OR the macro file "MDIOpen.edt" is accidentally deleted.

How to Fix this Issue?
 Follow below steps

1.  Open WinEdit 5.4 program.
2.  Go to "Options" menu and select "Preferences" submenu.
3.  Click on "MDI Events" tab.

4.  Now check all four paths. The directory of all files (MDIOpen-Before.edt, MDIOpen.edt, MDIActivate.edt and MDISave.edt) must be same.

Here %b represent "C:\Program Files\WinEdt Team\WinEdt" path.
Now let's check two directories:
                 First  "C:\Program Files\WinEdt Team\WinEdt\Macros"
                 Second: "C:\Program Files\WinEdt Team\WinEdt\Macros\Events"

First Directory  "C:\Program Files\WinEdt Team\WinEdt\Macros ": 

Second Directory: "C:\Program Files\WinEdt Team\WinEdt\Macros\Events"


Now it is clear that the path in  MDI Events preference is WRONG.

5. Change the path from "[Exe("%b\Macros\MDIOpen.edt");]"  to "[Exe("%b\Macros\Events\MDIOpen.edt");]".


6. Now, restart the WinEdit program. Hope the error is fixed.

Let me know in the comment section if the error is NOT fixed.

-Thank you


Tuesday, September 13, 2016

How to install TexStudio with Miktex ?

In order to work with Latex,  texStudio is one of the best solutions as TeX editor.
See the comparison of TexStudio with other other text editor.

Download the following software.

  1. Latex editor: TeXstudio 
    1. Select according to your OS environment.
  2. Repository: miktex repository 
    •  
      select the version according your OS environment
    •  Save the installer file, such as "setup-2.9.6050.exe"
    • If you have very good internet connection, better you download 'net install' which allow you to download the complete MikTeX repository.
So, now you must have the following software packages

Downloading and Installing MikTeX repository

1.  Open the miktex installer file. Here it is "Setup-2.9.6050.exe"
2.  Click on 'Next' button....

3.  Select 'Download MiKTeX' option to keep the repository for future purpose. <4.JPG>
4.  Select "Complete MiKTeX" option to install all packages.

5.  Now the choose the download source and click on 'Next' button.

6.  Give the location, where you want to keep the downloaded repository.

7.  Now the final step to download the repository. Click on "Start" button.

8. Now you need to wait until the download finish.
9. Once the download is finished, click on "Next" button.

10. Click on "Close" button.

      Here we finish downloading the MiKTeX repository. Now we perform the installation process.
11. Open the same miktex installer file again and follow step 2. Here it is "Setup-2.9.6050.exe"
12. Now Select "Install MiKTeX" option and click on "Next" button.

13. Now select "Complete MiKTeX" option and click on "Next" button.
14. Select the user based on your requirement and click on "Next" option.

15. Now you need to specify the path of already downloaded MikTeX repository. Click on "Next" button.

16. Now click on "Next" button, leaving the default installation directory.
17. Leave the default setting, and press "Next" button.
18. Click on "Start" button after reviewing the settings.
19. After the installation process finish, click on "Next" button and then click on "Close" button.

Installing TeXstudio   
Now install TeXstudio editor. Installing TeXstudio is quite easy. Just follow the installation wizard and leave all the setting as default. Below are some screenshot given for reference.
1
2

3

4

5

6

7


Saturday, July 2, 2016

Latex : Part - 5 : Writing Algorithm/Pseudocode in Latex


Requirement :
  • You should have updated Latex repository
  • Any editor for writing latex code, such as TexStudio, Notepad++, Sublime Text etc.
Step:
  • In order to write a pseudo code or an algorithm in Latex , you must use algorithm package at the beginning of the document 
  • Below are some examples, you can follow.
Example - 1
Output
Figure-1.a : Example 1 output
Source Code 


Figure-1.b : Source code for the output given in Figure-1.a


Note:
  1. Please insert \; at end of each statement.
  2. "\qquad" command is used to give a horizontal tab at the beginning of the line.
Example - 2
   Note:

  • Use algorithmic package 
                          
Output

Figure 2.a: Example 2

Source Code 


Figure 2.b :  Source code for output in Figure 2.a 
Example - 3
Note:
  • Use following packages
Output


Source Code


Thursday, May 14, 2015

LaTeX : Part - 4 : Examples of Mathematical equations - Advance.

In previous post, we have discussed the basic to write a mathematical equation. In following section we will be discussing on some advance equations.

Some samples on advanced mathematical equation:

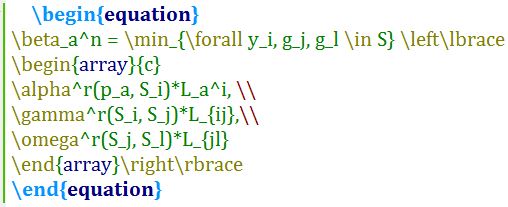
Source Code Output
 

Some more to come Some more to come

Friday, May 8, 2015

LaTeX : Part - 4 : Examples of Mathematical equations - Basic.

In following section we will have some examples, how to write mathematical equations in Latex.

Please use following package:
For more information on "amsmath" package, please click here.
Use of $ (Dollar symbol)

$ is generally used in a paragraph, where some part of paragraph such as variables, special symbols etc are required to display in math mode.

Example-1 :
Hello reader, here is the first math equation example. For this $ a + b $ , below is the output.

Output

Example-2 :
Hello reader, here is the first math equation example. For this $$ a + b $$ , below is the output.

Output
 
 Henceforth, we will use $$ instead of $.

Here is list of some sample codes and their output:

Source Code Output


Some more to come Some more to come